I love being able to visualize my rows of crochet, especially in the round, to determine where to place increases and decreases. I normally use microsoft word or excel or publisher but there are probably tons of programs that would work just as well. You just need to be able to make shapes and adjust their degree of rotation.
For making a picture of single crochet stitches in the round, I start by making a little jelly bean shape. I think it sort of represents the V's you see at the top of the stitches when they're put next to each other. Also, actual jelly beans are great for when you don't have a computer handy.
Then figure out how many stitches will be in the round you're making. I have a little document with a bunch of different sizes to play around with, so I always save any new ones I make. Let's say this one will be 5 stitches. Take the width of your shape (mine is .5 inches) and multiply it by the number of stitches to get the circumference: .5 * 5 = 2.5 inches. Then divide your circumference by Pi to find the diameter and make a circle with that diameter. 2.5 / 3.14159 = .79 inches.
Next, copy the jelly bean until you have the right number of stitches. To find the degree they should be turned to, divide 360 by the number of stitches and multiply it by the stitch number of each jelly bean (360/5*stitch number = angle.) Starting with 0, the angles will be: 0, 72, 144, 216, and 288 (or 72, 144, 216, 288, and 360, which ever you prefer). Format each bean according to it's angle and position the shapes around the circle.
You can use this technique to make any size you need.
I like to let a program like excel do all the calculating work for me:
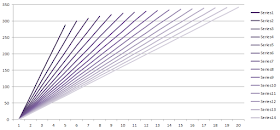
And as an interesting bonus, the data makes a pretty pattern when you put it in a line graph:


No comments:
Post a Comment