snowy field image

snowy field image

Saturday, December 19, 2015

Crochet Frozen Dolls

One little set

Two little sets

Finally done with both sets of these!

The wonderful body pattern for these dolls comes from Beth Webber.  Here is the pattern link on ravelry.  I made my own little pattern for Olaf and the clothes, hair, and details I did myself.

Time to package them up and ship them off.

Mini Knitted Christmas Sweaters


I found a very cute pattern for a mini Christmas sweater ornament on Craftsy.  I had a little yarn left over from making some finger-less mitts so I worked up a few of these for coworkers Christmas gifts.  I decided not to work decreases in the arms to make it a little less complicated.  Very fun pattern and it made a super cute finished project.


Odin taking a look.  He get so curious when I put things in the window to take a picture.

Little kitty feet
Two of them finished with some duplicate stitch and little paper clip hangers


Thursday, December 10, 2015

How to make an envelope of any size without a pattern


If you want to make an envelope out of pretty scrapbooking paper but don't have a spare plain one to make a template, you can easily make one by following some basic principles of folding.  This is great if you need a teeny tiny envelope like above, or a giant one.  The basic construction of an envelope is fairly simple: a square or rectangular paper, larger than your note or card, which is folded around it to contain and conceal it.  Sounds simple right?  However when it comes down to making your own, suddenly there are corners and flaps everywhere and things get a little muddy.

Start with a square of paper and find the center.  Either match up opposite corners and gently pinch the middle or use a straight edge and lightly mark lines with a pencil.


Fold two opposite corners to the center.  (Then unfold)  These will be the side flaps.


Now fold the other two corners past the center point and unfold.  Just how far past the center you want to go will determine how square or rectangular your envelope will be.

You now how something like this: (turned 45 degrees)


The dotted square represents a shape slightly larger than your note.  Fold all your corners in and take a look at what you have.  You can adjust your folds or add some details.  You will probably want to clip the excess paper where the folds meet and shape your corners; clip the folds at a wider angle to avoid bunching, round off the top corner and cut off the bottom corner flat where it meets the two side flaps when folded.

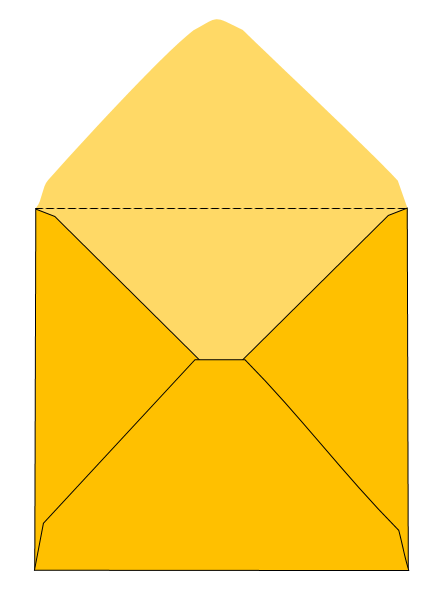
To fold your envelope, first fold in the two side flaps, then the bottom, and lastly the top.  You can secure the sides to the bottom with glue or tape, or leave them open.


Wednesday, December 9, 2015

Easy Double Crochet Rings


(Hey guys - special shout out to those visiting from crochet concupiscence!)

This method uses the double crochet foundation row method with a slight variation.  For the standard DCFR (double crochet foundation row), you pull up an extra loop (or chain 1) before completing each double crochet so you can avoid chaining at the beginning of a project.  (You can also use SC or HDC for this!)

In order to make a ring with a hole in the middle, you alternate chaining one before the double crochet and omitting the chain to create a DC2tog stitch.  This is for the smallest size you can make (24 stitches).  This is replicating row 2 of a typical circular crochet pattern (DC 12 in a ring, DC 2 in each DC from round 1).

You can use this method to make any size ring.  Figure out which row you would be on and what the total stitches would be, as well as what the pattern would be, and work that as a foundation row rather than into a row below.


So for example, to make a ring with 120 stitches (row 10 of a typical flat, circular crochet project), you would make a DCFR with the following pattern: Chain 3, DC in the first chain (your first inc is complete), DC 8, (inc, DC 8) x5.

This leaves you with a nice finished edge on the outside and inside, and you don't have to chain to start.  Variations on this pattern are endless.

Tuesday, December 8, 2015

3D Christmas Tree Cookies


These didn't come out quite as well as the reindeer, but it's a good first effort.  I probably need to go back and redesign the cutter a little.  The slots are much deeper so they need to fit better than shallow ones.  Still fun to decorate and eat.

I could make this one much easier on myself and have one cutter that is a whole tree and another that is a half and just use one whole and two halves and stick them together with icing.  Then I wouldn't have to worry about the slots... hmmmm... or just use one cutter for the whole tree and cut some of them in half.  Would have to be careful though.

I could also put stars on top before baking and have them bake together in the oven.