snowy field image

snowy field image
Showing posts with label Pattern. Show all posts

Thursday, December 10, 2015

How to make an envelope of any size without a pattern


If you want to make an envelope out of pretty scrapbooking paper but don't have a spare plain one to make a template, you can easily make one by following some basic principles of folding.  This is great if you need a teeny tiny envelope like above, or a giant one.  The basic construction of an envelope is fairly simple: a square or rectangular paper, larger than your note or card, which is folded around it to contain and conceal it.  Sounds simple right?  However when it comes down to making your own, suddenly there are corners and flaps everywhere and things get a little muddy.

Start with a square of paper and find the center.  Either match up opposite corners and gently pinch the middle or use a straight edge and lightly mark lines with a pencil.


Fold two opposite corners to the center.  (Then unfold)  These will be the side flaps.


Now fold the other two corners past the center point and unfold.  Just how far past the center you want to go will determine how square or rectangular your envelope will be.

You now how something like this: (turned 45 degrees)


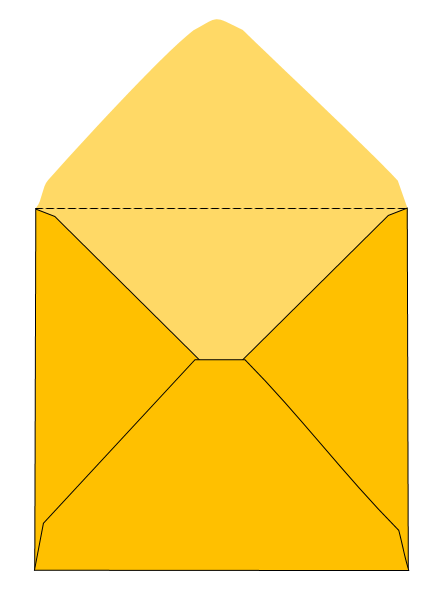
The dotted square represents a shape slightly larger than your note.  Fold all your corners in and take a look at what you have.  You can adjust your folds or add some details.  You will probably want to clip the excess paper where the folds meet and shape your corners; clip the folds at a wider angle to avoid bunching, round off the top corner and cut off the bottom corner flat where it meets the two side flaps when folded.

To fold your envelope, first fold in the two side flaps, then the bottom, and lastly the top.  You can secure the sides to the bottom with glue or tape, or leave them open.


Wednesday, December 9, 2015

Easy Double Crochet Rings


(Hey guys - special shout out to those visiting from crochet concupiscence!)

This method uses the double crochet foundation row method with a slight variation.  For the standard DCFR (double crochet foundation row), you pull up an extra loop (or chain 1) before completing each double crochet so you can avoid chaining at the beginning of a project.  (You can also use SC or HDC for this!)

In order to make a ring with a hole in the middle, you alternate chaining one before the double crochet and omitting the chain to create a DC2tog stitch.  This is for the smallest size you can make (24 stitches).  This is replicating row 2 of a typical circular crochet pattern (DC 12 in a ring, DC 2 in each DC from round 1).

You can use this method to make any size ring.  Figure out which row you would be on and what the total stitches would be, as well as what the pattern would be, and work that as a foundation row rather than into a row below.


So for example, to make a ring with 120 stitches (row 10 of a typical flat, circular crochet project), you would make a DCFR with the following pattern: Chain 3, DC in the first chain (your first inc is complete), DC 8, (inc, DC 8) x5.

This leaves you with a nice finished edge on the outside and inside, and you don't have to chain to start.  Variations on this pattern are endless.

Tuesday, December 8, 2015

3D Christmas Tree Cookies


These didn't come out quite as well as the reindeer, but it's a good first effort.  I probably need to go back and redesign the cutter a little.  The slots are much deeper so they need to fit better than shallow ones.  Still fun to decorate and eat.

I could make this one much easier on myself and have one cutter that is a whole tree and another that is a half and just use one whole and two halves and stick them together with icing.  Then I wouldn't have to worry about the slots... hmmmm... or just use one cutter for the whole tree and cut some of them in half.  Would have to be careful though.

I could also put stars on top before baking and have them bake together in the oven.

Thursday, November 26, 2015

3D Gingerbread Reindeer Cookies (now with printable template)

Yay I'm a reindeer cookie!

I'm so excited that this actually worked!

I saw a beautiful photo a while ago of little reindeer cookies that stood up and were put together with 2 cookie cutter designs for the body and legs.  After some fiddling I was able to draw some templates and cut them on card stock to trace around on some gingerbread dough.  I ambitiously went for a third design for some antlers as well as the body and legs.

The cookie recipe is derived from this great post at bakingamoment.com

I halved the recipe and forgot to halve the spices so I ended up with some very gingery cookies.

My first attempt was a bit unimpressive but it actually worked!  The shapes fit together and stood up.


I learned a few things from these first ones:
  • My cookie recipe was good - no baking power or soda, cold dough, and short fast baking time.  The cookies did not expand and looked pretty much like they did when I cut them out.
  • Sharp corners burn!  His poor little tail!  All of my shapes needed to be rounded or thickened so they baked evenly.  
  • If your locking shapes are slightly off, you can gently cut them with a serrated knife when they are hot from the oven.  
  • If the shapes are too small, there will be weak points where they will be more likely to break.  One set of antlers didn't make it!
  • Cutting cookie shapes by hand with a knife and a template is boring and horrible.

 So... how to make your own custom cookie cutter?  I could probably order one and later I found a few very cute etsy shops that will 3D print cookie cutter designs for you.  But I wanted to make these now!  First I tried using the metal from a soda can, which proved too weak and brittle.  When you bend it at a 90 degree angle, the metal cracks.

Then I found an old cookie tin with thicker more bendable metal in the back of our pantry.  It was a beast to take apart but with some pliers and our kitchen sheers I was able to get some 3/4 inch wide strips of metal (aluminum maybe?) out of it.  With my new designs, I traced my 3 templates onto cardboard and used the pliers to bend the metal into shape.

Card stock and cardboard templates.  Looking so good!
Home made cookie cutters.  I'm freaking out, man!

It took a lot of patience and cursing to get the metal shapes right.  But finally, they came out and they actually look like the design.  I did not roll the tops of the metal down to make a hand-friendly cutter, so to actually use these, I pushed them down with a square of cardboard.  Otherwise, I would have some adorable shapes poked into my hands.  

I cut enough shapes for 5-6 cookies and "decorated" them.  Honestly they looked a lot more classy before I trashed them up but they taste great and I had so much fun digging through my decorations.  I opted not to attach all the pieces to form the deer, so they're just standing up on their own with the interlocking pieces.

Seriously my decorating is awful.  Observe these pictures at your own risk:


You can see the gingery pain in their little mini chocolate chip eyes.  Kill meeeeee!  So many possibilities for different shapes with this idea... maybe some dinosaurs next???

Here's a little template on graph paper.  Each little square is 1/4 of an inch.  If I can figure out how I might make a printable thingy but I'm not sure how to do it.

1/4 inch graph paper (each square is 1/4 inch)

Happy Thanksgiving!

EDIT: Here's a link to a googledrive document that has a printable template in two sizes.  I used the smaller size for my cookies.  This is meant to be printed on 8.5 x 11 paper and there is a scale for inches at the top.

Friday, September 25, 2015

Double Crochet Foundation Row


I learned about the single crochet foundation row as a means to bypass chaining and single crocheting at the beginning of a project but it recently occurred to me that any stitch could be done the same way.  I'm sure this isn't a new concept but it's new to me so it's pretty exciting.  I think the concept of a double crochet foundation row is actually more intuitive than single crochet and makes it easier to understand what you're doing in terms of building the stitches and the chain at the same time because it's a more involved stitch.  With single crochet I tend to get lost along the way about where I'm inserting the hook and have to look it up every time I do it.  Double crochet is much easier to complete in practice and you can easily see your mistakes if you forget to chain 1 because you'll see what looks like an increase instead of side by side stitches.  (You could do this on purpose to make it turn if you wanted a shape instead of a long straight row.)  I think it also makes it more clear how to progress after your foundation chain is complete because there's no question about which side is which because of the taller stitch.

Steps for double crochet foundation row:

  1. Chain 3 (this will act as your first DC)
  2. Yarn over and pull up a loop in the first chain (3 loops on the hook).  You can work this in any part of the chain you want.  Find what works best for you.
  3. Chain 1 (still 3 loops on the hook)
  4. Work a double crochet as normal (yarn over pull through 2, yarn over pull through 2 again)
  5. Then repeat steps 2, 3, and 4 except you are working into the bottom 'V' created by your chain 1 from the previous stitch.  
This will give you a nice little row of double crochets with a pretty 'V' on the top and bottom without needing to chain to start with.

Some tips for starting out:

  • Use a multi-colored yarn to practice.  I do this for most new stitches I'm trying out because it makes it very clear what you did as the colors change.
  • Mark your chain 1's if you're unsure of where to insert the hook.  This will help you get off to a good start.
  • Turn your work to the side as if you're crocheting upwards instead of from right to left (if you're right handed) and turn your work so that you can see the left side (the bottom) which will make the 'V's stand out so you know where to insert.


Friday, August 21, 2015

Frankenstein never scared me...


This is one one of my many someday projects.  I think I'll always have more ideas than finished projects.  Maybe that's a good thing.  Christopher Walken didn't actually say this, it was some comedian I forget the name of but I thought it was so funny.  I want to learn how to do embroidery in this style.  Probably need to re-do the wording but this is good enough for now while it's still just an idea.